Simply stated, an alpha channel is a picture consisting of either black or white pixels: wherever there is black - you will be able to see through the image, wherever there is white, you will see the original picture.
First, you must have an original image to work with (for this example, your original image does not already have an alpha channel).
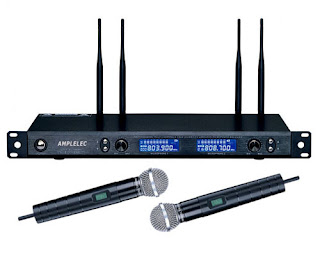
This is the picture we will be working with. We will only deal with the reciever, not the microphones, in the picture. Our goal is to create a picture of the reciever which includes an alpha channel.
Open the original picture in Photoshop. In the dialog that show you the "Layers" of the picture, you will now only have one layer. Make sure that layer is active, then click "Ctrl-A" (select all), then "Ctrl-C" (copy). Click on the tab next to "Layers" which is called "Channels". Then click on the icon below which says "Create New Channel" when you hover your mouse over it. This will create an alpha channel, in addition to your RGB channels. Click on the alpha channel to make it active, then "Ctrl-V" (paste) the copy of our image into the alpha channel. [Screen-01]
Since we only want the reciever, and not the microphones, let's crop the picture, so you'll end up with something like this: [Screen-02]
Now we have the picture cropped, and we have created an alpha channel that , as of now, has a copy of the reciever in it. What we want to do is to turn that copy of the receiver that's in the alpha channel into a black and white image. The receiver should be white and the background should be black.
Let's hide the RGB channels and just work on the alpha channel for now. [Screen-03]
Use the magic wand tool and click somewhere in the background so that it becomes highlighted. Then using the Paint Bucket tool, fill in the background with the color black. Under "Select", choose "Inverse" (Shift-Ctrl-I) to invert the selection so that now the receiver is selected. Using the Paint bucket tool again, lets make the receiver all white. this can be done by clicking on the receiver repeatedly until the whole thing is white. It'll now look like this: [Screen-04]
Now click on the "RGB" channel so that all the RGB channels are now visible, keeping the alpha channel visible and it will now look like this: [Screen-05]
You are done! You have just turned that boring bitmap picture of a receiver into a fun picture of a receiver that includes an alpha channel.
The only other thing you have to do is save the picture in a format that keeps the alpha channel. I always save it to .TGA.
To save as a .TGA, go to "File"-->"Save As". Choose .tga as file type, under the options dialog, choose "32 bits/pixel".
And voila!
Note: If you plan on going back and editing the alpha channel directly, use the .tga filke type. When you save as .png, you loose the separate alpha channel.
Download all the files associated with this tutorial in a .zip file here.
No comments:
Post a Comment